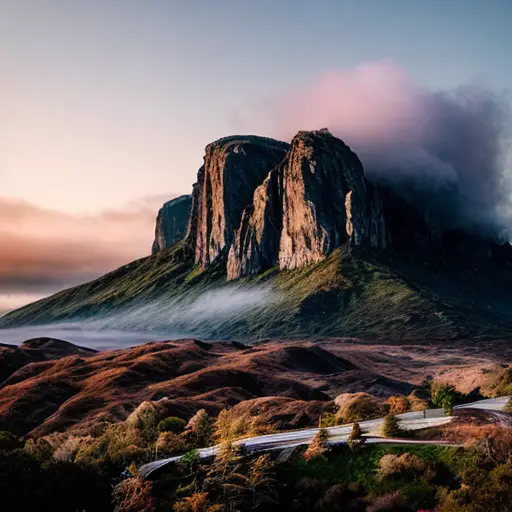
Alright, folks, let's dive into the fascinating world of banding in photography! Now, picture this: you've just captured a breathtaking sunset with your trusty camera, only to discover some pesky horizontal lines ruining your masterpiece. Well, fear not, my fellow shutterbugs, for we are about to unravel the mystery of this common image artifact. Banding, my friends, occurs when your camera struggles to smoothly transition between different shades of color, resulting in those unsightly stripes. It's like a rebellious zebra photobombing your shot! So, next time you encounter this pesky bandit, remember to adjust your exposure settings and keep those color gradients in check. Happy shooting, and may the bands be forever in your favor!
Banding in photography refers to the occurrence of visible horizontal or vertical lines, resembling bands, across an image. These bands are typically caused by various factors such as poor lighting conditions, incorrect camera settings, or limitations in the camera's sensor. However, an intriguing fact about banding is that it can sometimes be intentionally created and utilized as an artistic technique. Some photographers purposely introduce banding into their images to evoke a sense of nostalgia or to create a vintage aesthetic reminiscent of old film cameras. By embracing this imperfection, they add a unique and captivating element to their photographs, showcasing the beauty that can be found even in technical limitations.
Welcome, fellow photography enthusiasts, to the intriguing world of banding! Now, let's uncover the causes and types of this pesky phenomenon that can turn our beautiful images into a chaotic mess. Banding can occur due to various factors, such as limitations in the camera's sensor or the compression of image files. It can manifest in two main types: luminance banding, which appears as visible lines in areas of smooth tonal transitions, and color banding, where abrupt shifts in color gradients create noticeable bands. So, dear photographers, be mindful of your equipment's capabilities, shoot in RAW for better data retention, and embrace the challenge of minimizing banding through careful exposure and post-processing techniques. Let's banish those bands and capture stunning images that are band-free!
Banding, the bane of every photographer's existence, can wreak havoc on our carefully composed images. But fear not, my fellow shutterbugs, for I bring you a guide to minimizing this unwanted artifact and preserving the integrity of your photographs.
First and foremost, it's crucial to understand the root causes of banding. One common culprit is inadequate bit depth, which refers to the number of colors a camera can capture. Opting for a camera with a higher bit depth, such as 12 or 14 bits, can significantly reduce the likelihood of banding. Additionally, shooting in RAW format instead of JPEG allows for greater flexibility in post-processing and minimizes compression-related banding.
Another technique to combat banding is to pay close attention to your exposure settings. Overexposing or underexposing an image can exacerbate banding, particularly in areas of smooth tonal transitions. By properly exposing your shots, you can ensure a more gradual and seamless transition between colors, reducing the chances of banding.
Post-processing also plays a crucial role in minimizing banding. Utilizing noise reduction tools, such as selective blurring or applying a subtle film grain effect, can help smooth out any visible bands. Additionally, avoiding aggressive adjustments to contrast or saturation can prevent banding from becoming more pronounced.
Lastly, when it comes to printing your images, choosing a high-quality printer and paper can make a world of difference. Some printers are more prone to introducing banding during the printing process, so it's worth investing in a reputable printer that can handle smooth color transitions with finesse. Similarly, selecting a paper with a higher color gamut can help preserve the integrity of your images and minimize banding.
In conclusion, while banding may seem like an insurmountable challenge, armed with the right techniques and tools, we can minimize its impact on our photographs. By understanding the causes of banding, paying attention to exposure settings, employing smart post-processing techniques, and choosing the right printing options, we can ensure that our images are band-free and truly showcase our artistic vision. So, fellow photographers, let's banish those bands and capture stunning, seamless images that leave no room for unwanted artifacts!
Fun fact: Banding in photography refers to the visible horizontal or vertical lines that appear in an image, often caused by poor lighting conditions or improper camera settings. These lines can sometimes resemble the appearance of a zebra's stripes, hence the term 'banding.' While banding is generally considered an unwanted artifact, some photographers have creatively embraced it, using it as a unique artistic effect in their images.
When it comes to tackling banding in photography, post-processing solutions can be a game-changer. Picture this: you've captured a stunning landscape, only to discover those pesky bands ruining the smooth color gradients. Fear not, for editing software comes to the rescue! By utilizing tools like gradient maps, noise reduction filters, and selective adjustments, you can effectively minimize or even eliminate banding. Adjusting the tonal curve, applying dithering techniques, or adding a subtle texture overlay can also help break up the visible bands and create a more seamless transition between colors. So, dear photographers, embrace the power of post-processing and let your creativity shine as you banish banding from your images with a few simple clicks and tweaks.
